.png.5a0f08430bae173944a56977dd41765f.png)

Muhammed Sarikaya
-
Posts
211 -
Joined
-
Last visited
Everything posted by Muhammed Sarikaya
-
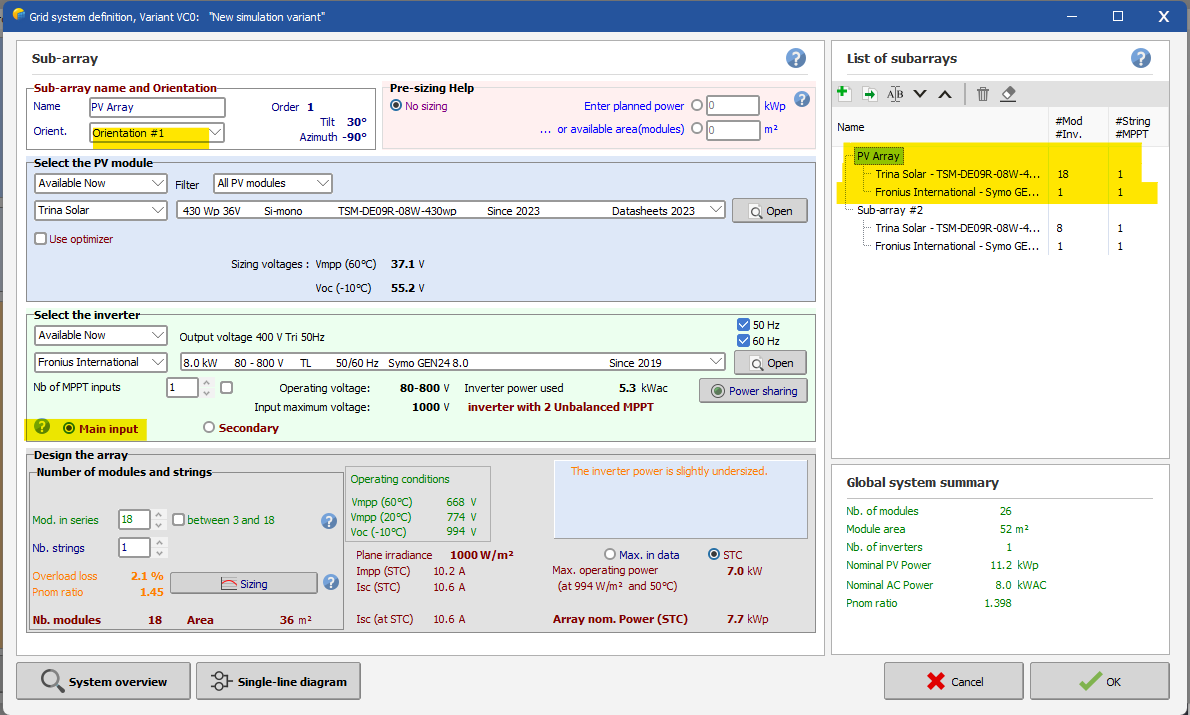
 Dear Mohsin, First of all, in PVsyst, azimuth 0° always represents the direction of the sun. In your case, when you input 180°, it means your PV modules are facing north. You mentioned having a roof with two different tilt angles, but you didn't specify the azimuth angles. Usually, when installing PV modules on a tilted roof with multiple orientations, you need to define both the tilt and azimuth angles of your roof. Additionally, in the system setup, you need to create two subarrays for each orientation. Here is an example with a screenshot: Please be cautious because the inverter you have selected have unbalanced MPPT (Maximum Power Point Tracking). You should configure the Main Input with a higher PV array capacity than the second input. You can check this in the two screenshots provided. If you have any question, don't esitate to write me. Regards, Muhammed
-
Connection of modules with different azimuths or inclinations.
Muhammed Sarikaya replied to Georgy PM's topic in How-to
Dear Georgy, I can't answer you because it depends on multiple variables. In PVsyst, you can't set different orientations within a series of modules. I suggest increasing the detailed losses for mismatch in your simulation. The idea is to simulate the worst-case scenario. That way, when you install your PV modules, the actual electrical production will likely be higher than the simulation. Regards, Muhammed Sarikaya -
Dear Vera, Today you can do this project separately by creating two distinct project. Regards, Muhammed Sarikaya
-
Dear Michalis Angeli, You can mix only 2 orientations. Regards, Muhammed Sarikaya
-
different strings orientation for the same inverter
Muhammed Sarikaya replied to MARCOZ15's topic in How-to
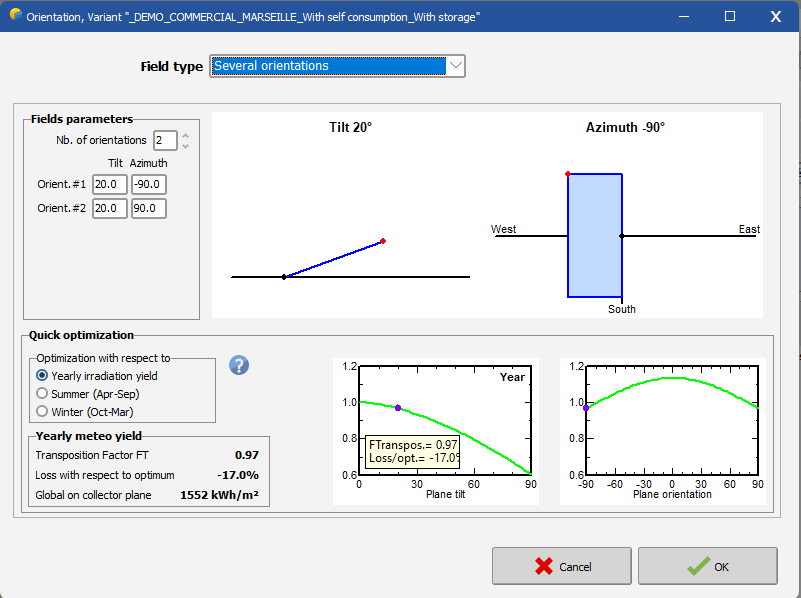
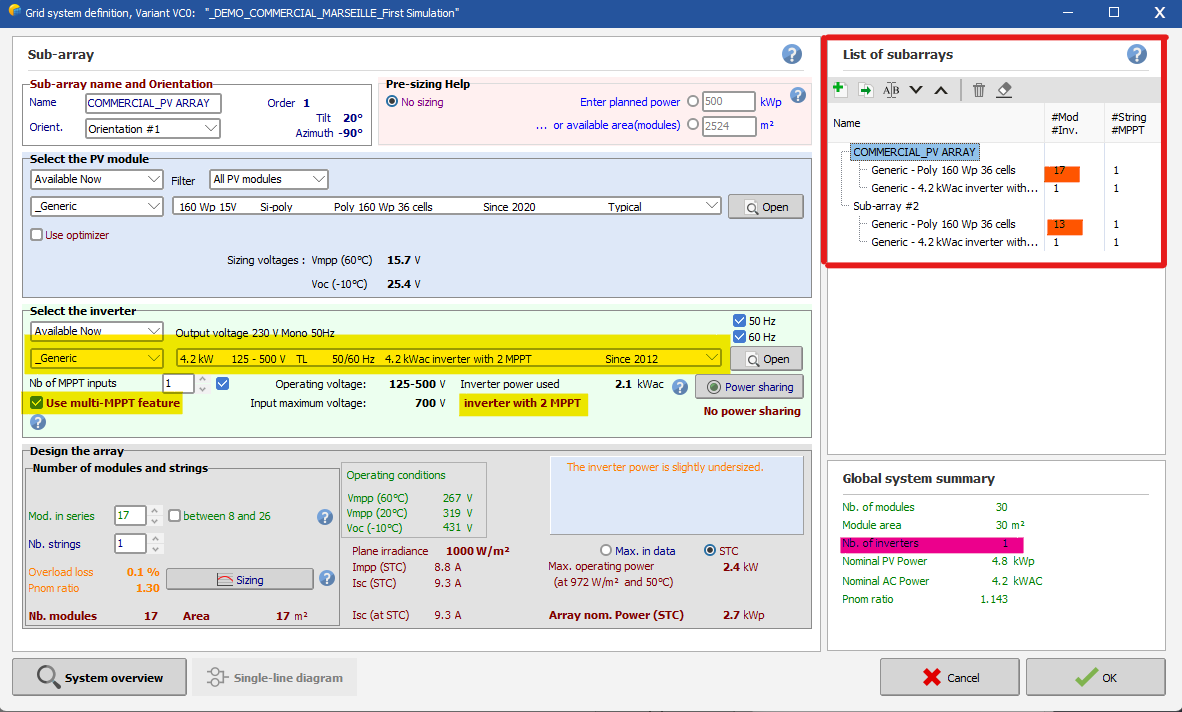
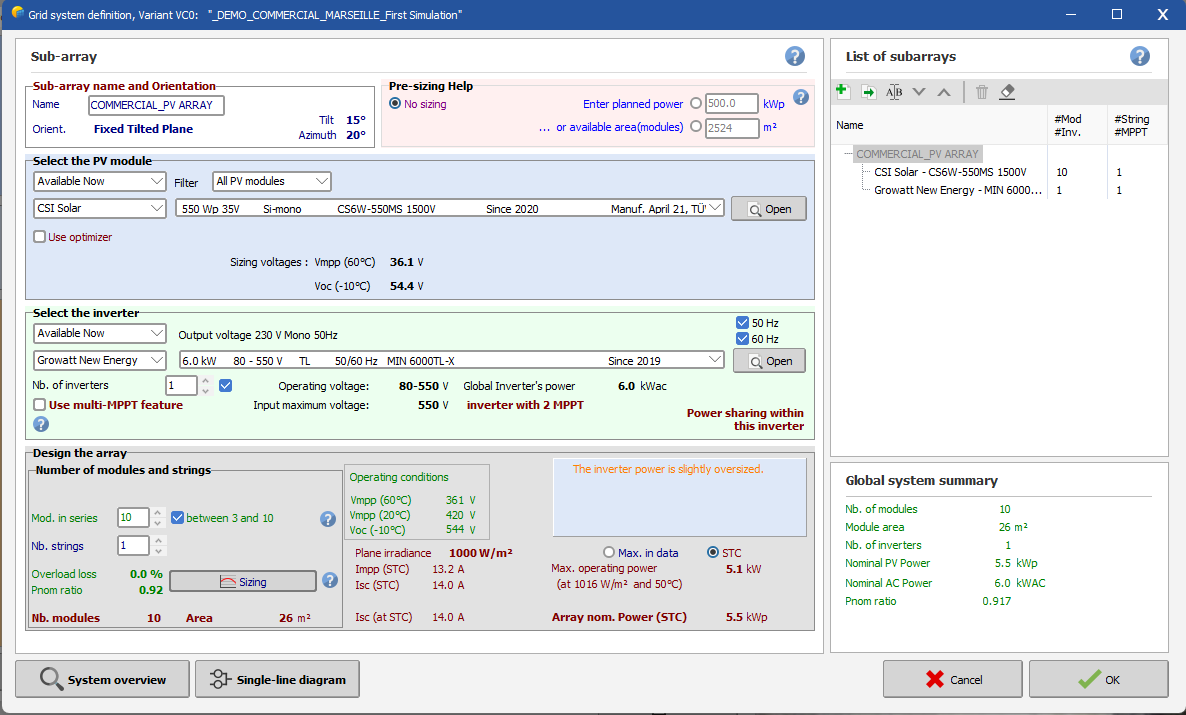
Dear Marcoz15 It's very simple; first, you need to select "Orientation" and choose the field type as "Several orientations," as shown in this image: Then, when configuring the system, there are a few things you need to be careful about: In the "List of subarrays," you should create two subarrays. When selecting your inverter, make sure it has a minimum of 2 MPPTs. Activate the multi-MPPT feature, and don't forget to assign the orientation for each subarray. Does that make it clearer? Regards, Muhammed Sarikaya
-
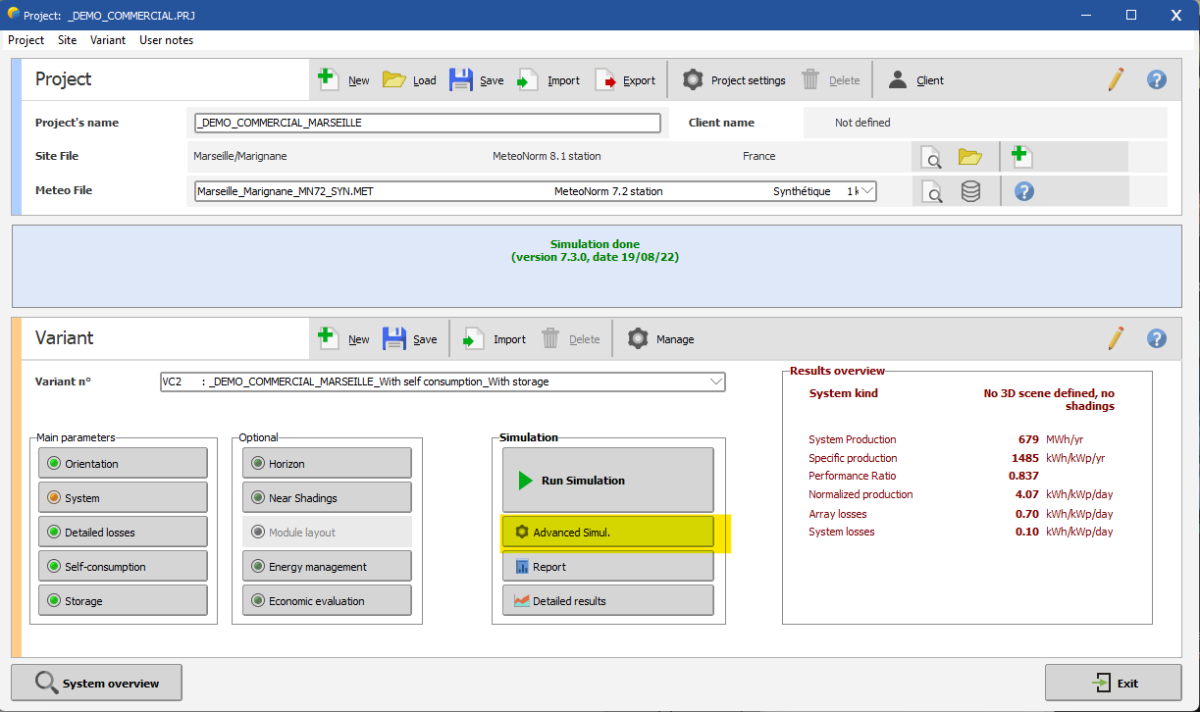
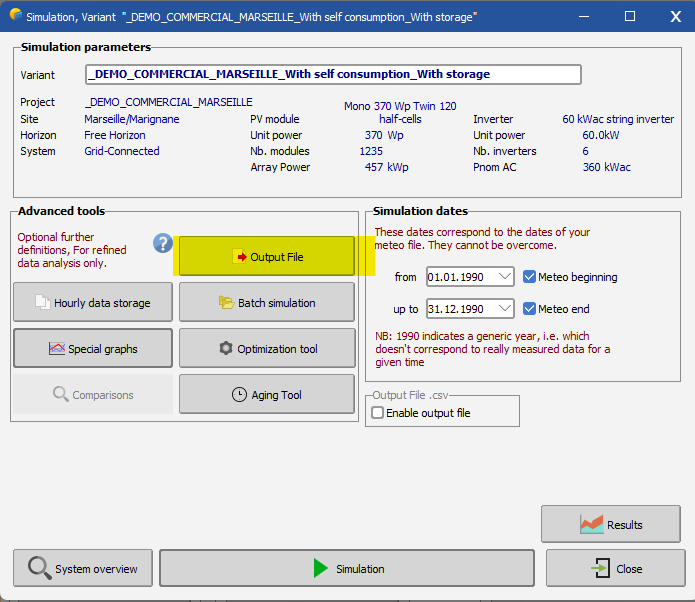
Dear Mohamed, You can export your result with advanced simul. Click on advance simul. Click on Output File: Next, you need to select the name for your output file and confirm the simulation variables you want. In this same windows, you have to click on "Simulation" if you want to generate a csv file that can be opened in excel. Regards, Muhammed Sarikaya
-
Defining imported PV modules as a string
Muhammed Sarikaya replied to Sama Ashraf's topic in Shadings and tracking
Dear Sama Ashraf, There is a procedure you have to follow in SketchUp before you import it into PVsyst. Please send us an email at support@pvsyst.com, and I will send you the tutorial PDF where we explain how to import a 3D scene from SketchUp. Regards, Muhammed Sarikaya -
Dear Waiphyo, You can simulate a single string in an inverter with 2 MPPT inputs. You can follow these steps: If you don't check the box "use multi-MPPT feature," it doesn't mean that the simulation will not find the maximum power of your PV array. PVsyst will always find the maximum power. In this situation, PVsyst will only use the power for the calculation and will not take into account the number of entries on your inverter. Regards, Muhammed Sarikaya
-
Insufficient load profile? What does this mean?
Muhammed Sarikaya replied to Aaron Polo's topic in PV Components
Dear Aaron Polo Can you please tell me how you have defined your load profile in the button "user's needs"? -
Dear Nahel, Indeed, using millimeters might not be the best choice. Do you know which unit of measurement you are using in your 3D software for drawing your 3D scene project? Regards, Muhammed Sarikaya
-
Dear Nihal Meena, Try changing the input size to millimeters, as the input size in your 3D software might not be set correctly. If you have any more questions, please don't hesitate to contact me. Regards, Muhammed Sarikaya
-
Dear Andel In PVsyst, you can simulate an unlimited shed or unlimited trackers only with a bifacial system. Regards, Muhammed Sarikaya
-
Farm is shutting down because of 900v and above
Muhammed Sarikaya replied to Nikoloz's topic in Problems / Bugs
Dear Nikoloz, I'm sorry, but I can't provide an answer without more details about your project. Could you please share a screenshot of your system? Regards, Muhammed Sarikaya -
Customer Requested modules and String Variations out or range
Muhammed Sarikaya replied to Vera's topic in How-to
Dear Vera, This is precisely what you need to understand: For this inverter to function, there is a minimum voltage requirement. The 'operating voltage' range is listed as 684-1450 V. It's important to note that temperature affects voltage; the higher the temperature, the lower the voltage. That's why we base our calculations on a module temperature of 60°C. I suggest increasing the number of modules or opting for an inverter with less power. If you need any assistance, please don't hesitate to contact me. Regards, Muhammed Sarikaya -
Dear Michalis Angeli, This is not a problem with the trial version. You need to follow my tutorial precisely, as outlined below. To activate the button, click on the surface of your roof. After that, you can proceed with my tutorial. Regards, Muhammed Sarikaya
-
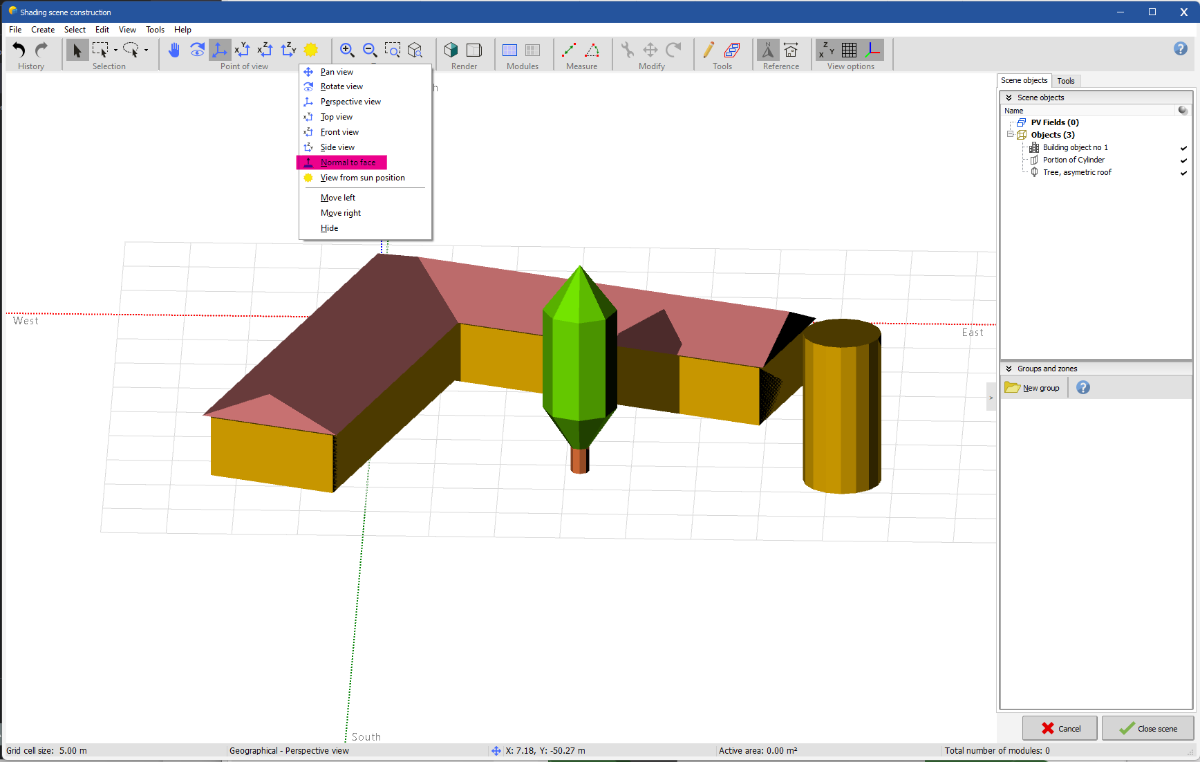
Dear Michalis Angeli, I understand that creating your project in the 3D scene can be a bit challenging at times. Allow me to introduce another method for constructing your project. Here's how to do it: Right-click on the menu bar where "point of view" is located, and then click on "normal to face." This will reveal the "normal to face" button in the menu: Afterward, your 3D scene should be set to the realistic view for rendering. Following this, you need to click on the surface of your roof. In my example, I clicked on the left roof. To verify if the roof is selected, you'll notice that the color is slightly different from the rest of the building: After clicking on "normal to face" in the "point of view" menu, you'll notice that the view has changed to align with the normal of your selected face: Then, you can create a single PV table by using the "Draw" button located in the "Tools" menu. Following this, draw a rectangle of the size you desire on the surface of your roof. You can later modify the created zone to align with your table. To do this, double-click on the created zone table and make the necessary adjustments. You can also view in basic parameters to check the orientation of your table. If you require further assistance with this topic, please don't hesitate to reach out to me. Regards, Muhammed
-
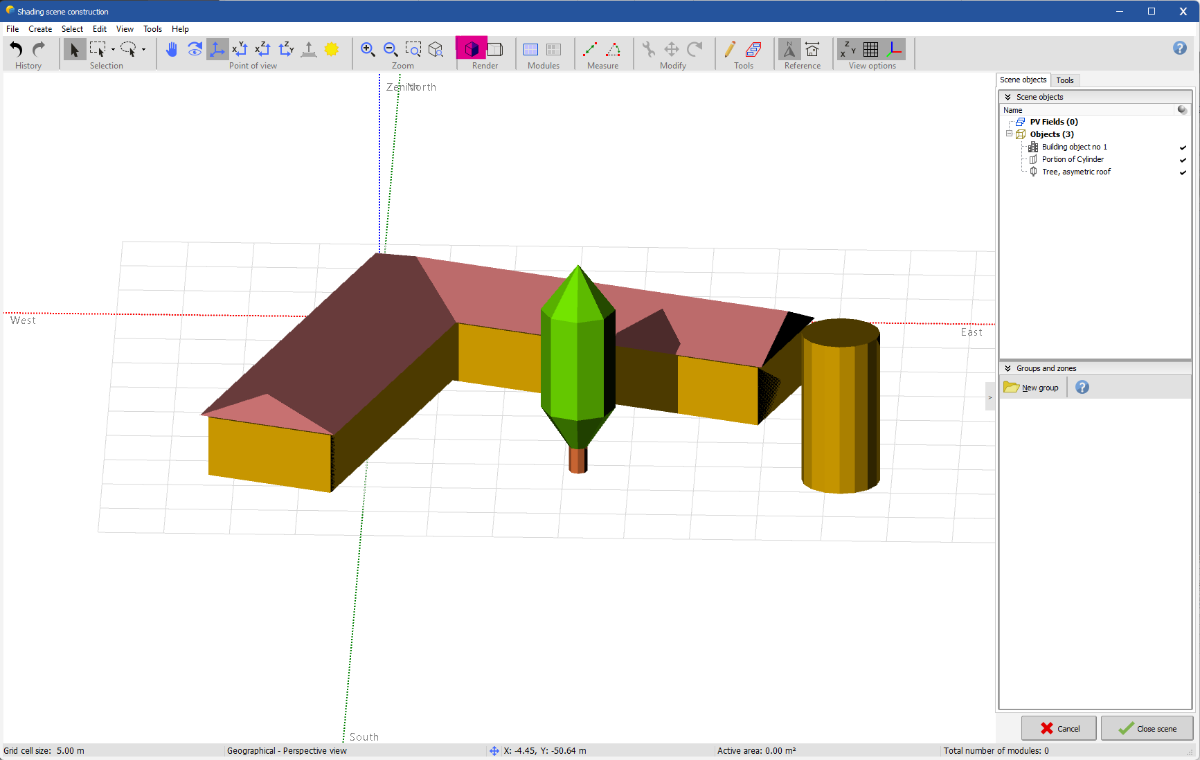
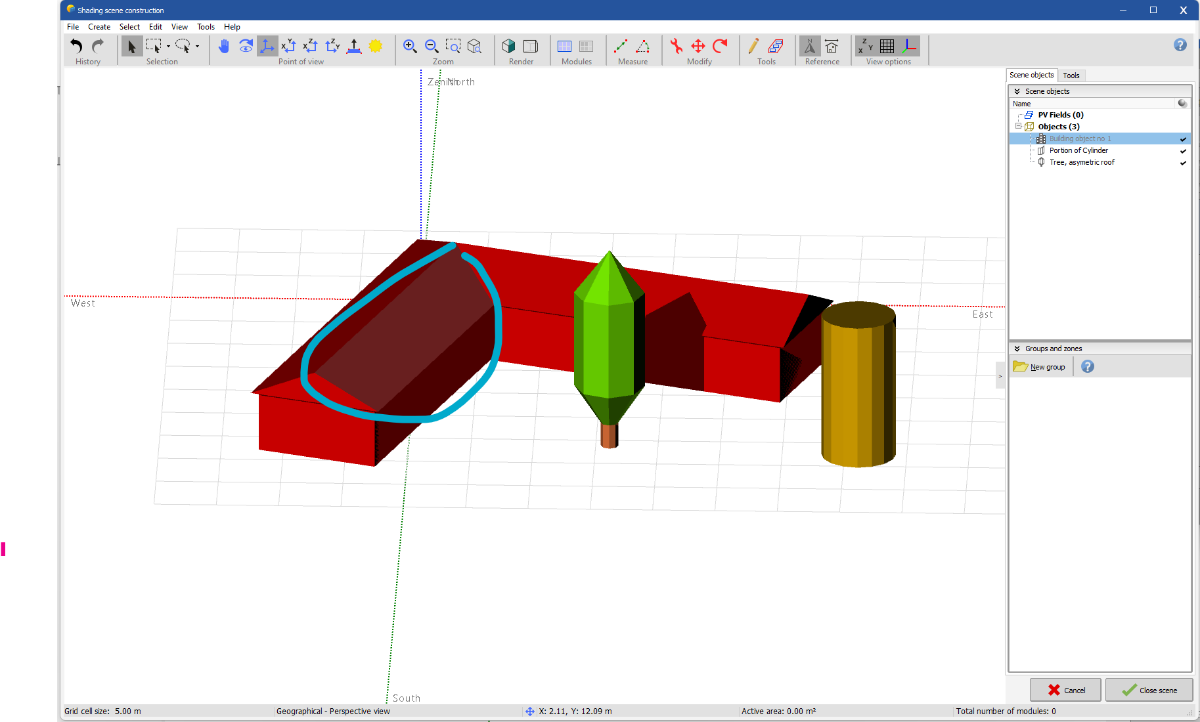
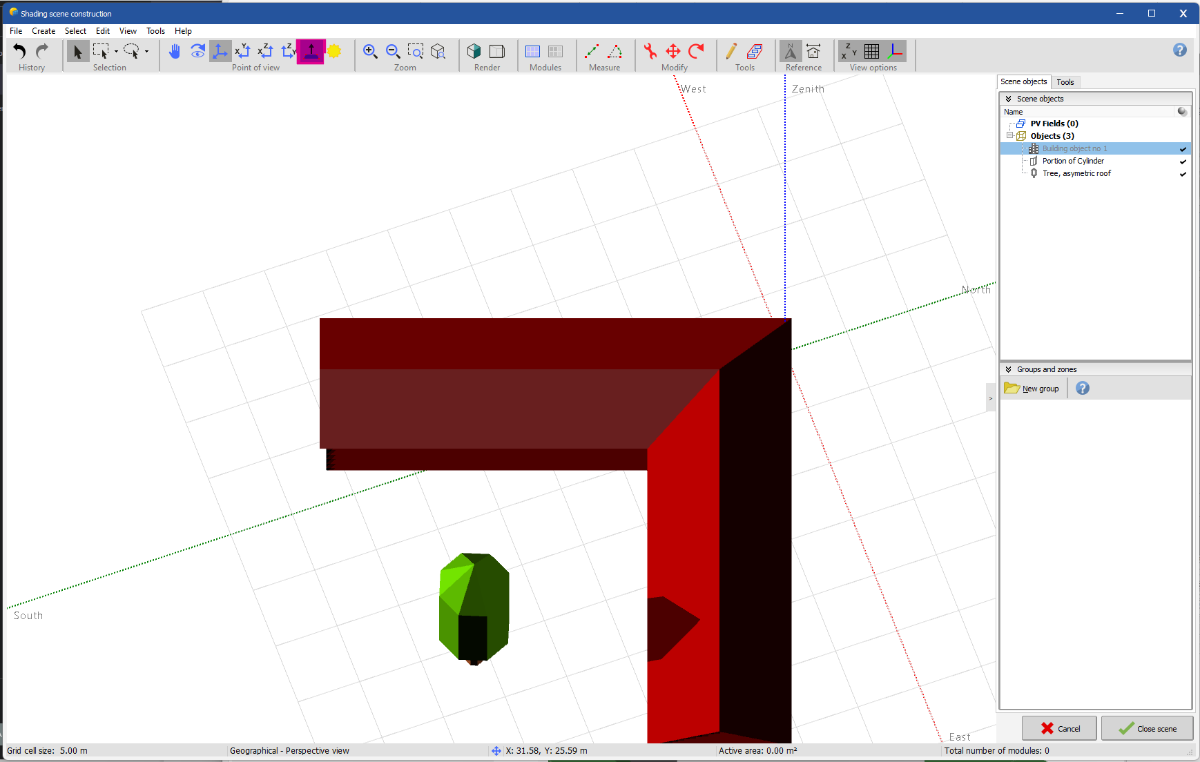
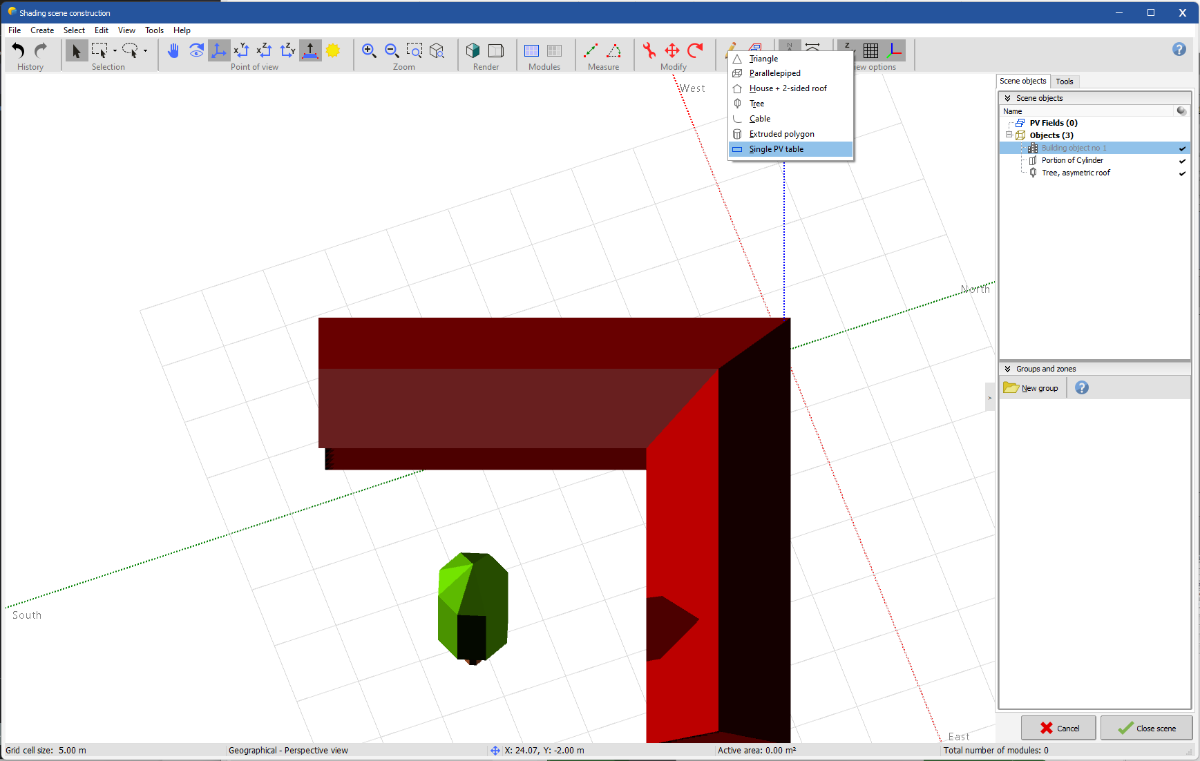
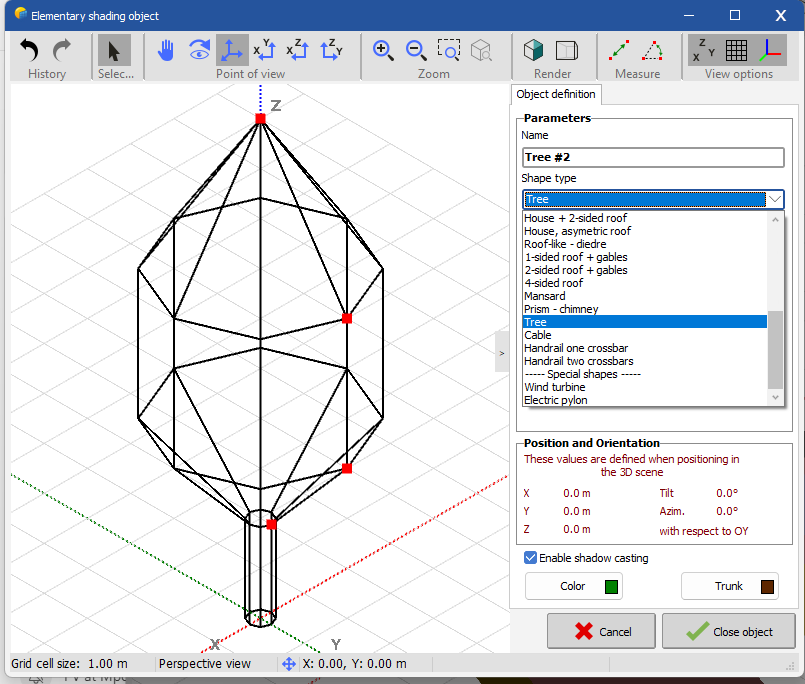
Dear Hrira, Please avoid adding too many details to the 3D scene as it makes the simulation more complex and increases the calculation time. For trees, you can easily incorporate a template that we provide into the 3D scene in PVsyst. Here, I'll demonstrate how to do it: In 3D scene, click on : - Create - Elementary shading object - And then select Tree in shape type Then you can modify the dimensions of the tree as you desire. Additionally, after adding it to your 3D scene, you can copy and paste it as many times as needed. If you require further assistance with this topic, please feel free to reach out to me. Regards, Muhammed Sarikaya
-
Dear Gilberto Borges, With PVsyst, you can simulate a system with self-consumption and grid unavailability. There is a video tutorial that can help you to understand: And a help page also: https://www.pvsyst.com/help/gridstorage_weakgrid.htm I suggest you to watch this tutorial, if there is anything you don't understand, don't hesitate to write me. Best regards, Muhammed Sarikaya
-
Hello Dear OlliP, I think that the date format is not correct. I noticed in the CSV source file that the month is represented as 'Jan.' and it's likely that PVsyst cannot interpret it correctly. Could you please open your CSV file in Excel and try to change the date format so that the month is represented in numerical form? Regards, Muhammed Sarikaya
-
Dear Elisdown, You have to contact SMA if your modification will take into account the power sharing between each MPPT. If you want to connect only 3 MPPTs out of 12 MPPTs, PVsyst will not allow it. In reality, you should contact SMA to inquire whether it's possible to configure only 3 MPPTs and if it's allowed. Regards, Muhammed Sarikaya
-
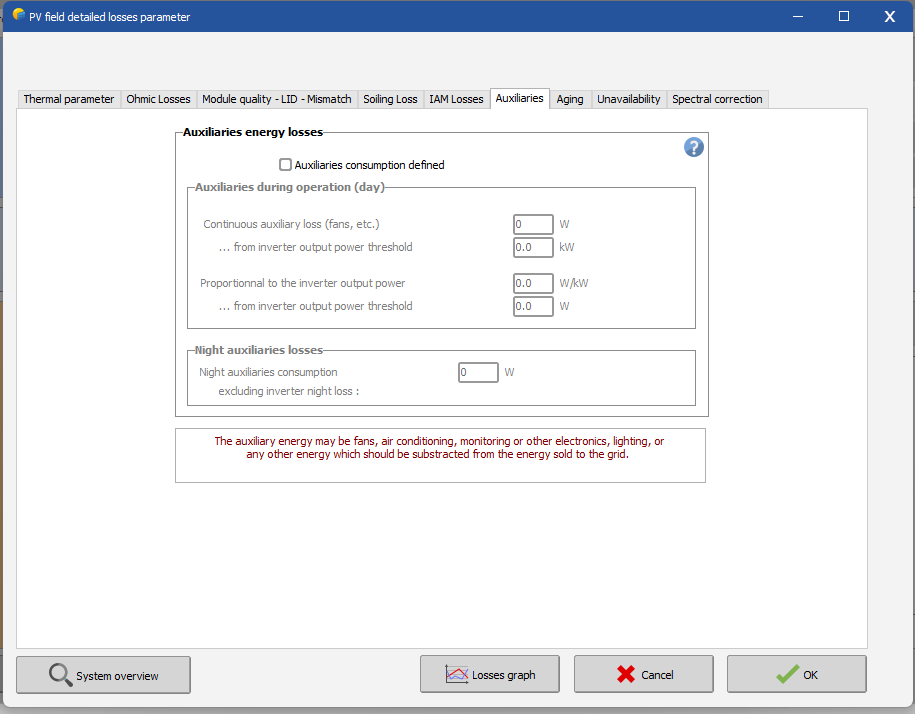
Dear Mohamed1298, We don't have option for calculating Auxiliaries loss using excel. In detailed loss, you have the definition "Auxiliaries" You have some information in the help : https://www.pvsyst.com/help/auxiliaries_consumption.htm#:~:text=The auxiliaries consumption is the,be sold to the grid. Also, you can defin night auxiliaries losses in the second box. If you have other questions, don't hesitate to ask me. Best regards, Muhammed Sarikaya
-
Power Factor - Energy Management
Muhammed Sarikaya replied to Michalis Angeli's topic in Simulations
Dear Michalis Angeli, It depends of your need, of your project and of the grid manager. Sometimes you have to add power factor and sometimes you don't need. Regards, Muhammed Sarikaya -
Net Metering with Self consumption
Muhammed Sarikaya replied to Michalis Angeli's topic in Simulations
Dear Michalis Angeli, Thank you for your explanation. In PVsyst, the option self-consumption allows you to simulate the ratio between what you can consume regarding your load profile and what you inject in the grid. Regards, Muhammed Sarikaya -
Dear user, I don't understand "With no PV" Can you give me more details about your project? Also, in PVsyst, you most define a load profil if you want to simulate a stand alone project. Regards, Muhammed Sarikaya
-
Net Metering with Self consumption
Muhammed Sarikaya replied to Michalis Angeli's topic in Simulations
Dear Michalis Angeli, I don't know the Net Metering Systems. In the option Self-Consumption, you must use a load profile. You can visualise some example in the folder : \PVsyst7.0_Data\Templates The template is a CSV file and follows a precise pattern: If you have at least hourly values, you can use it in the simulation. Regards, Muhammed Sarikaya