
Nils Lang
-
Posts
92 -
Joined
-
Last visited
Everything posted by Nils Lang
-
 The most common cause for this error is that your Internet access settings (Anti Virus, Firewall or Proxy) prevent PVsyst from accessing our server directly. For instructions on allowing access, consult your network administrator or your Anti Virus, Firewall or Proxy documentation. Another alternative is to use our external activation procedure. This procedure is documented in PVsyst help or in our tutorials:
 -
You should check first that you have strictly followed each of the three steps of external activation. Here is a link to our tutorials. One of them explains step by step how to perform an external license activation: https://www.youtube.com/channel/UCMzsEWHk3f7XD_dg1lngmzg If your usage rights are still not updated then email your PVsyst log files to support@pvsyst.com. Note that you can easily export them using PVsyst menu .
-
PVsyst allows to import projects or components directly from another workspace. This feature is particularly useful if you have multiple workspaces and you want to merge them in one. Note that you have to merge them two by two. How to proceed: - PVsyst menu allows to open the Import PVsyst projects and components dialog - Then the button allows to specify the workspace (\PVsyst640_Data\) you want to import from. The content of this workspace appears on left side - Note that the content of your current/local workspace appears on the right side - Note also that you can find detailed information on this dialog in PVsyst help either directly by using the help button (?) or after opening PVsyst help by navigating to: Technical aspects > File organisation > User data > Projects and PV components >
-
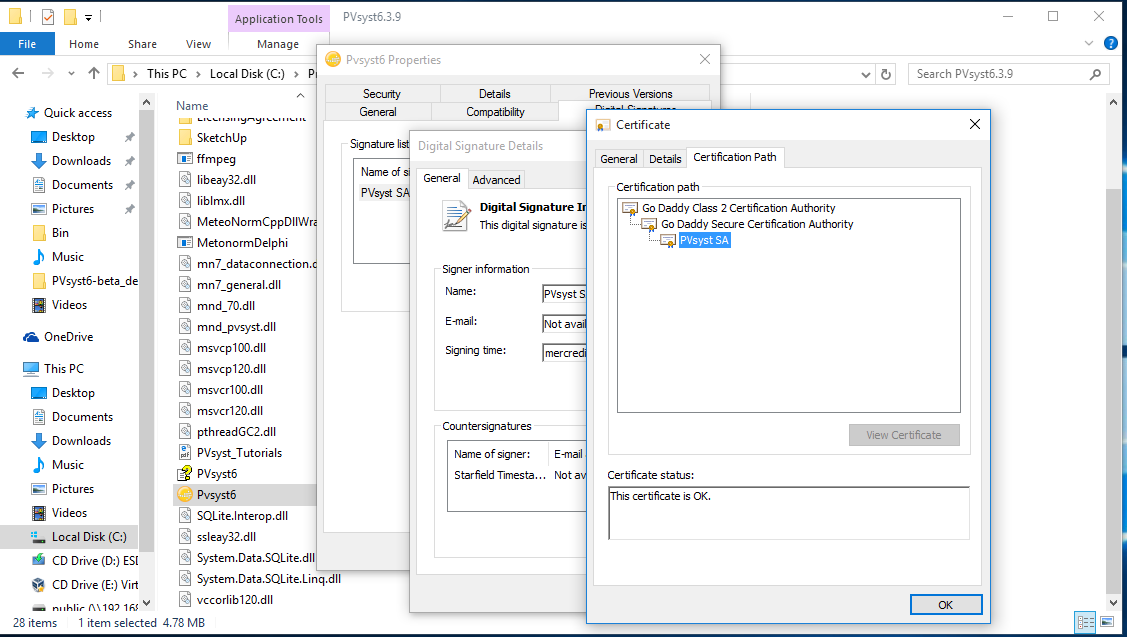
Solution using Windows Update The easiest way to fix this issue is to update your operating system using "Windows Update" and to make sure that you have the latest Service Pack installed. This operation will automatically install the latest certificates that are required to run PVsyst. If you still have troubles then you should check the certificate properties of PVsyst application (file PVsyst6.exe located by default in C:\program files (x86)\PVsyst6.X.X\). The content should be similar to the screen capture attached: In case of error, you can use the button that appears in this dialog to manually install the missing certificates.

-
Installation directory must be on a local hard drive
Nils Lang replied to tranterengineering's topic in Problems / Bugs
Please check the points of the following list: 1. If your PVsyst installer is located on a network drive then copy it first on a local drive 2. Check that you have enough free space remaining on your hard drive 2. You need to have Windows Admin rights 3. Your download of PVsyst v6.x.x may have failed. Check that the file size is greater than 100'000 Ko (for PVsyst 6.3.5 and later) and eventually download it again 4. You may have another installation of PVsyst already running. In this case, the solution is to restart your PC and install PVsyst again. 5. Make sure you don't have another MSI based installer running at the same time (close the other applications running then look in Task Manager for "msiexec.exe") 6. Run PVsyst installer as administrator (from a command prompt launched as administrator) 7. Make sure your computer operating system is up-to-date using Windows Update 8. Perform a silent installation using msiexec.exe with option /i and /qn. More details are available in our FAQ: http://forum.pvsyst.com/viewtopic.php?f=17&t=1961&hilit=msi. -
In fact, we have not added new possibilities to control PVsyst from a script but removed a limitation. From v6.40, it's possible to start PVsyst from an external script using any Windows Working Directory. You can for example define a Windows shortcut to start PVsyst and place it anywhere.
-
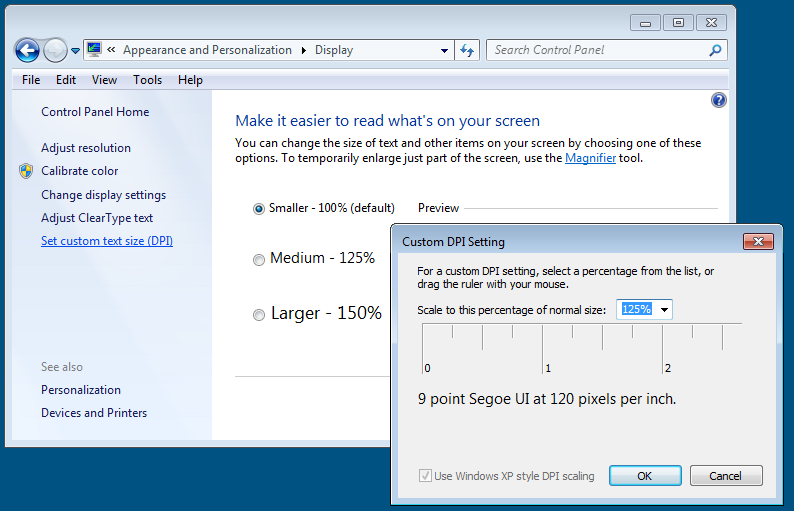
On some displays, we have observed unexpected PVsyst display behavior like text overwritten in reports or in dialog lists like it is showed in the following attachments: This problem is related to Windows Diplay Settings. Changing text size and/or DPI settings will fix the problem.
-
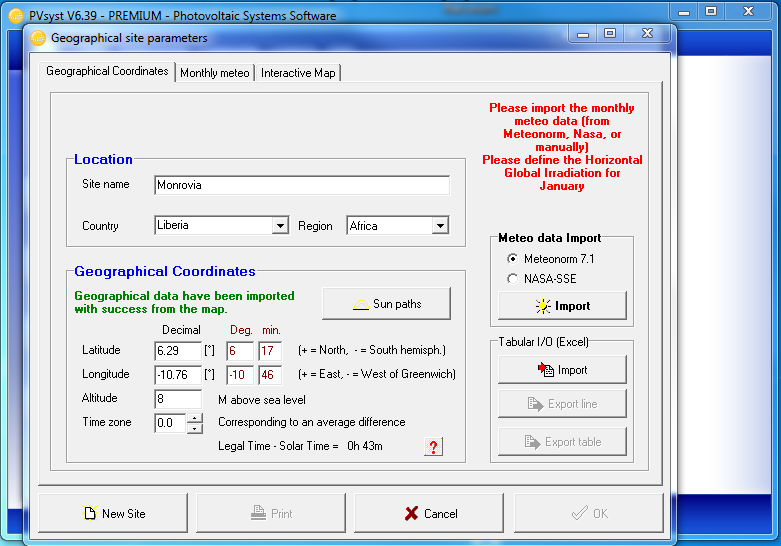
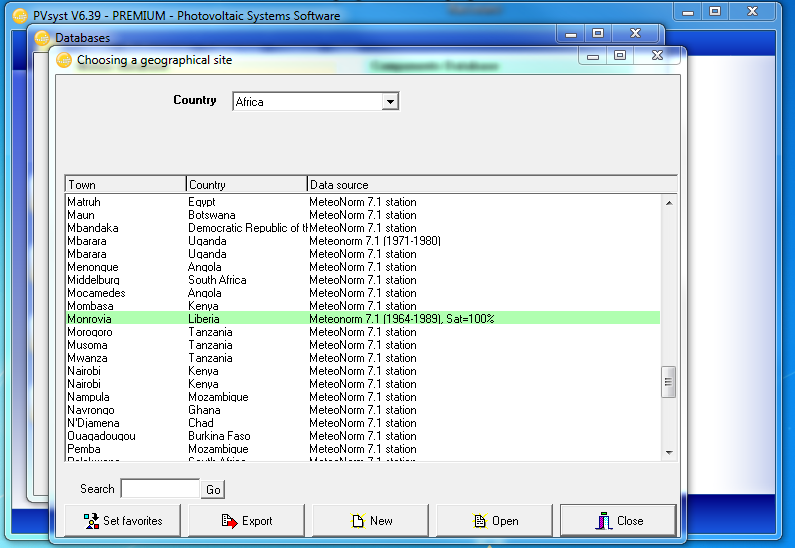
In addition to a predefined list of locations, PVsyst allows you to import and use meteorological data from any location on earth. Here is a simple procedure showing how to add any location to the predefined list of Meteonorm stations: 1. From PVsyst main, select buttons 2. Select button and enter your location in the search bar 3. Select the button to import geographical data from the map 4. Select the button to import meteorological data from Meteonorm database 5. Finally, select the button and save the files of your new location 6. Your new location is now visible in the list.
-
Note that you can use the same procedure to backup or archive your PVsyst user data: 1. Use the export full workspace to backup your data in a zip file 2. Use the import full workspace to restore your data from a zip file in case you had for example a disk failure.
-
Note that you can check the status of your Go Daddy certificates using Windows Certificates Manager (certmgr.msc).
-
In one case, on a laptop with screen resolution of 1920 by 1080 pixels, we have observed text out of margin when printing a PVsyst report. Enabling Windows screen setting "XP Style DPI Scaling" fixed the problem. Windows Control Panel